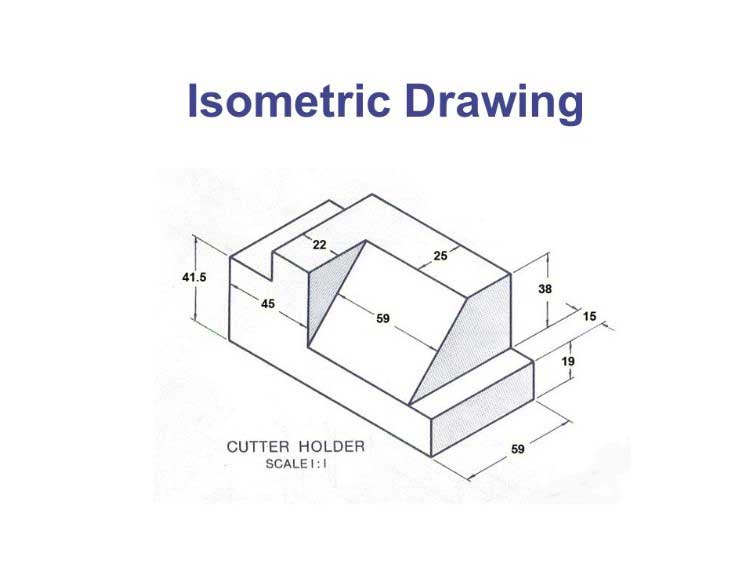
what is a isometric drawing
In this article, you'll learn Isometric Drawing, Isometric Projection – Its Types, Methods, etc. in details.
So, Let's Get Started.
Isometric Projection.
Table of Contents
- Isometric Projection.
- Isometric Scale:
- Method of Drawing Isometric Scale:
- Difference between Isometric Drawing and Isometric Projection.
- Isometric lines, circles, and curves;
- Isometric Scale:
- Methods OF Drawing Isometric Drawing.
- 1. Box Method:
- 2. Off-set Method:
In an isometric projection, the plane is placed in such a way that all the, three visible sides of the object make same angle with one another.
In this way, all the three sides meet at a point making an angle of 120° with one another.
These lines are called Isometric Axes.
In the figure, the lines which are parallel to these lines are called isometric lines, and those lines which are not parallel to these lines are called Non-isometric Lines.
Two isometric axes make an angle of 30° with the horizontal line. While the third axis makes an angle of 90°.

Isometric Scale:
Since, in isometric projection, the isometric line makes an angle of 30° with the horizontal lines, therefore, their length is not equal to the actual length, but it is only 82% of the actual length.
The isometric scale is prepared to form an isometric projection. With the help of this scale, the actual dimensions are transformed into isometric dimensions.
Method of Drawing Isometric Scale:
Following method is used for drawing isometric scale:
After drawing a horizontal line, draw two lines at 45° and 30° angle with it.
Put marks on the 45° line according to the actual scale.
Now draw perpendicular offsets from 45° line up to 30° line which will represent the isometric scale.
Difference between Isometric Drawing and Isometric Projection.
The method of drawing Isometric Drawing and Isometric Projection is the same.
All the dimensions in the isometric drawing are actual while in the Isometric projection, the isometric scale is to be used.
As a result, the dimensions are less than the actual ones.
To get isometric dimension from the actual dimension, it is to be multiplied with 82/ 100.
Isometric lines, circles, and curves;
The lines which are drawn parallel to the isometric axes in forming isometric projection are called isometric lines.
The represented length is not equal to the actual length, but it is 82% of it.
In the same way, isometric circles are also not the actual circles, but they are elliptic ones:
For drawing such circles, first of all, the isometric square is constructed. Then the four centers of an ellipse are shown.
These are in fact, the points of intersection of the corner of the bigger angle of the isometric square and the bisector of the sides confronting it.
The circle is completed by drawing arcs from these points. If some other arc is to be constructed, then the same method is to be adopted.
Methods OF Drawing Isometric Drawing.
Following are the two methods of drawing isometric drawing:
1. Box Method.
2. Off-set Method.

1. Box Method:
This method of drawing isometric drawing is easy and intelligible. However, it takes much time for the drawing.
In this method, the maximum length, breadth, and height of an object are noted.
A box is constructed in accordance with these dimensions.
These dimensions of the box are represented according to isometric projection.
These make angles of degrees 30, 30 and 90 with the horizontal line.
After this other parts of the object are shown.
For this purpose, isometric lines are drawn parallel to the isometric axis. After this, non-isometric lines, circles, and other curves are drawn.
Moreover, lastly, extra lines are erased.
Watch the Video Below to Learn How the Isometric projection is drawn.
2. Off-set Method:
In this method, for preparing isometric view, by selecting the side, the length, and breadth of the object are drawn parallel to the isometric axis.
After this, the other isometric and non-isometric lines are drawn according to the dimensions.
Lastly, circles and curves are drawn, and the drawing is completed by erasing extra lines.
Read Also:Auxiliary View – Its Types, Methods. [A Comprehensive Guide].
Read Also: Oblique Drawing, Projection – its Types, Examples.
Thanks! for reading this article. Please, Don't forget to share it.
what is a isometric drawing
Source: https://civilseek.com/isometric-drawing-projection/
Posted by: berryexisparbace.blogspot.com

0 Response to "what is a isometric drawing"
Post a Comment